A HISTORIC KITCHEN RENOVATION IN ANGELINO HEIGHTS.
Here is a start to finish kitchen remodel we did about a year ago. This was a part of a WHOLE HOUSE renovation in a 1905 Historic Craftsman which we now call home. We didn't intend to live here when we started. Slowly the neighborhood, the neighbors, the walkable nature of this little enclave in Echo Park and the house we created drew us in and we were stuck in love.
So... sometimes you remodel for yourself, other times you do it for someone else... This was both in a way. This was a cost conscious remodel. Lets start with what it looked like when we acquired the house.
GET READY. NO, I MEAN IT.

So, yeah, we bought a hoarder house.. A real deal one that came with most of the things you see in the picture (along with 2ooo sq ft or additional stuff). It's hard to describe how difficult this was to dig out. It really was a down and dirty situation, and the only option was to roll up your sleeves and attack.

SO, the first thing was to throw it all away and take a clear look. Was anything salvageable? This answer was NOPE. It was just gross. We kept the windows as they are protected by the HPOZ (Historic Preservation Overlay Zone). We removed the window AC and had that window rebuilt. Basically, we gutted it.

Do you know that scene in "Don't tell Mom the Babysitter is Dead" when the son throws and shoots dishes off the roof and says "The dishes are done", That's basically how this felt (see below) And if you are wondering why a pile of bricks are in the middle of the room, I would say don't ask.

NOW FOR THE DESIGN PLAN.
Start with inspiration.
Black cabinets. White walls. Brass Hardware. Chevron wood floors. A Linear orientation with chevron running lengthwise down the cabinet. Open Shelving. A huge "Found" island. Walnut countertops. This was what I wanted. Specifically.
Inspiration images below


DESIGN IT
I want to remind you I'm not really an interior designer. I'm a fashion designer. I don't have autocad or whatever fancy program they have. I have pencil and paper and I can throw some illustrator into the mix as needed. I need to communicate my thoughts to my guys... This is the plan.

I measure, I find and I sketch. My guys make it work. I usually prefer to find salvage kitchen cabinets and fix them up as opposed to buying new. New ones would cost 5 times as much and using salvage helps the environment. I got these cabinets used from Craigslist. I paid 700.00 for them total. They were real wood and in good shape.

I had a grand idea that I should paint them myself (instead of paying my painter who was working on site everyday in other places). Sometimes I just get things in my head. I wanted to use Chalk Paint for a vintage black feel and I wanted to use wax for a depth of color and sheen I was convinced I wasn't going to get from regular paint. I will say, I don't think I will ever do this again.

Before.

2 coats in + wax. I used charcoal color paint + dark wax 3 times to get black.

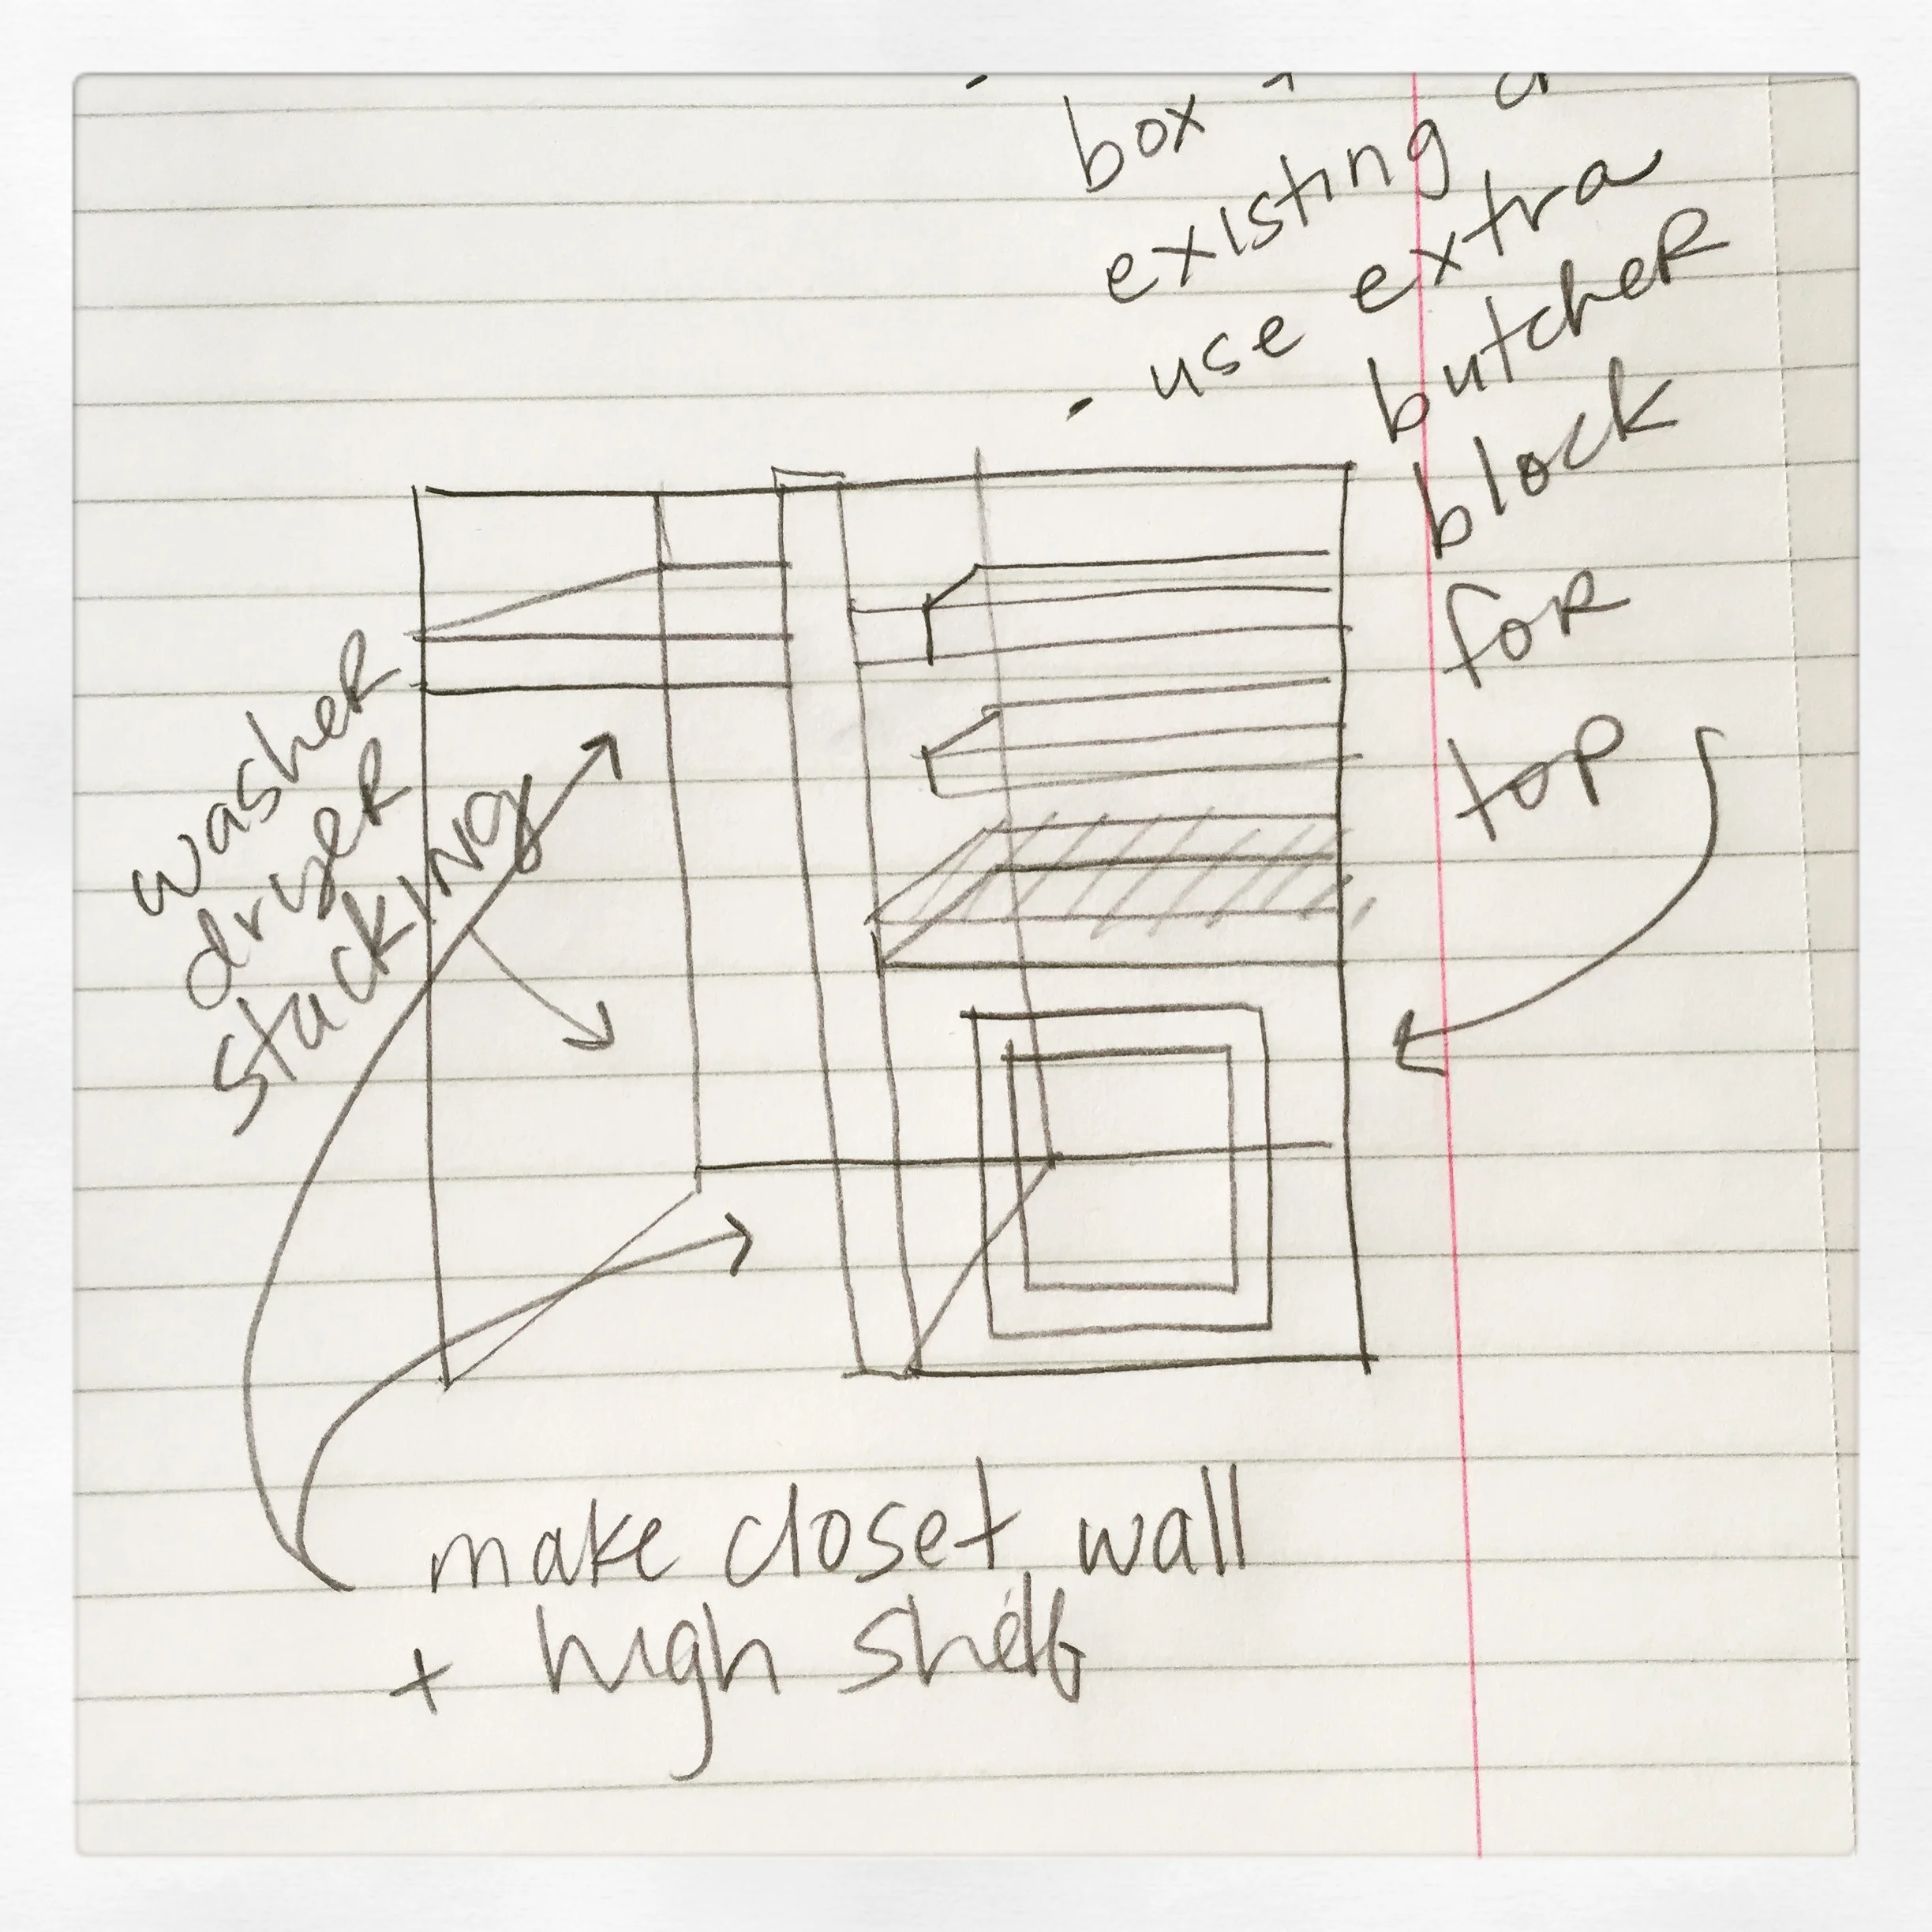
On the opposite side of this room, we'd be moving the stackable washer dryer and creating a little storage nook and some open shelving, tying the design into the original 1905 pantry. Our carpenter created cabinets from scratch and blended in adjusted boxes as needed to make the design work.

The farmhouse cabinets, farmhouse sink and counter tops fit into place. The sink is the Domsjo double bowl from IKEA. It's the best deal on the market and the reason I prefer it is that it is an overlay sink. It is a Top Mount. This means it self rims. It makes the installation clean and finished looking. I searched for the best counter top. I wanted walnut. I wanted real wood. I found these refinished real walnut slabs at Anderson Plywood's website. You can wipe these down and they are more water repellant than regular wood. They had a very finished look and were easy to cut and install and they were reasonably priced. I ordered online and they dropped them off a few days later.

AND NOW TIME FOR THE FLOORS!
This was where is got good. When the floor guys showed up, and we started to imagine the chevron pattern, my heart started doing little backflips. And with each day's progress, it swelled.

And swelled.

And swelled some more.

And then my heart stopped beating. BECAUSE LOOK! Do you see it??? My whole chevron dream was ruined. I imagined walking into through the french doors and seeing this long linear pattern drawing you along the length of the cabinets. So in my visions and dreams... The visual orientation comes from the patio french doors.. And the floor guys set up their visual orientation and chevron dreams from the kitchen door opposite the cabinets. AND this room from 1905 is not a perfect square... SO my dreams are not square to the cabinet and my dreams pay the bills, so these guys had to rip this out and start over. See below for the horror of an out of alignment chevron.


Let me assure you. No one was happy about it. I was happy the flooring contractor, the boss, agreed with me when I pointed this out. He fixed it. He tore it all out and re-did it. And it ended up fine. Better than fine. It ended up gorgeous.


TILE TIME!
Tile time isn't quite as easy as it seems. One thing you learn working with older houses is that walls and ceilings are never level. We have learned this over the course of being burned several times. It's never worked into our cost, and so we always go over budget. You should 100% assume that unless your house is practically brand new, your walls are uneven and not level and to pad your budget.
Our house was built in 1905, so every room is out of plumb and not square or level. We had to float and re-mud the walls and ceiling so that the ceiling was flat and square to the walls and the walls were even to lay tile on. Without doing this, you will have an uneven tile line at the ceiling, which you will notice after your tile is done. If you use larger tile, you won't be able to lay them flat, they will buckle. Sometimes walls can bow up to 1/2" or more in older houses. It gets us every time.

The tile is from Home Depot. I bought it by the case. It's white 6 x 6 tile. The most basic thing. BUT I love how the square offset as a brick pattern is a fresh change from subway tile. It's also larger and can fill up the entirety of the whole wall, which was the feeling I wanted. Openness. NO UPPERS. (Well, there is one over the fridge) Let me also point out, this house has become a Mills Act Home, which is AMAZING. It's a sort of historical designation that allows us to get a tax break because we fixed up the house. SOOO... long story short. You HAVE to make choices appropriate to the age of the house. That means Ceramic Tile, because that's what they had then. It means wood counter tops, because that's what they did then. Choices had to be thought out, appropriate and still fit my aesthetics and desires.

This is Narcisco (left) putting on my brass hardware and Fransisco his brother (right) connecting the fridge. These brothers I love working with. We have been working with them for years and I will never share their contact info. They are too secret and valuable. These are two of my best guys.

The one upper we have.

I found these custom walnut shelves used at my favorite building supply salvage store for about $10. I bought the beautiful brass brackets from Restoration Hardware TEEN. HERE IS A SECRET!!! I often buy lights, hardware, curtains, curtain rods, stuff from the teen, kids and baby version of stores like Restoration Hardware and Pottery Barn.. It's cheaper!!!
The collection of copper pots and pans came from a to die for estate sale at one of the hottest Highland Park mid century A-frames to sell in the last year. I saw the set, ran to it, and stumbled through the house carrying all these in my arms. TOTAL SCORE! $20!!!! FOR ALL!!!

Craigslist Score! $75 for 3 of these from a house in North Glendale. They are Restoration Hardware flush pendants. They are heavy and really good quality vintage inspired glass. They were nickel colored. I spray painted the base matte black. Perfect!
READY! THE BIG REVEAL! TA DA!

Do you notice the shelves are white here? It was before I decided the white wouldn't cut it. I wanted stained wood. These photos are a little out of order... but it's fine. Look at the INSANE light fixture over the sink. I admire it EVERYDAY. It's from ETSY. I LOVE it.

SOME RUG LOVE!

POT RACK IN!


THE LIVED IN LOOK

I bought this rustic island from the Rose Bowl in Pasadena (only $400! and he delivered it and assembled it in my kitchen). It is beautiful. It's 6 ft long! It really adds to the functionality and open cutting/prep space. It was the piece that pulled it all together.
This is the lived in photo. It isn't perfect. There are things in the photo, because there are things in life. But it's pretty awesome and it's even more awesome that it ended up mine.